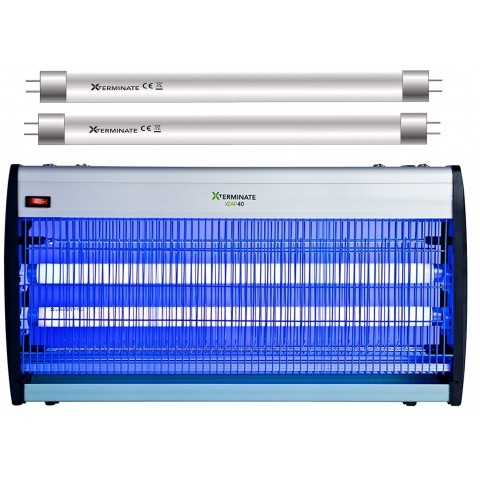
Xterminate 40W Commercial Electric Fly Killer with 2 Extra Replacement Bulbs


Customers also bought
You may also like
Product information
- Save money for when your tubes needs replacing
- Ultra powerful, easy to use electric fly killer with 2 x 20W bulbs fitted and an additional 2 bulbs as well as hanging chains included
- Impressive maximum output of 43W and large area coverage of up to 100m²
- Effectively eliminates annoying flying insects without the hassle
- Use your XZAP40 wall mounted, free standing or suspended from the ceiling
- Low maintenance: removable, large collection tray for easy and convenient cleaning
Get rid of flying insects fast without the need for messy and harmful sprays and poisons. Simply plug your XZAP40 in and watch it defeat the annoying flying insects.
The XZAP40 is a compact, high quality fly killer perfect for home use. It's extremely easy to use and clean with its convenient, removable and washable collection tray! It comes with 2 x 15W bulbs and a 1.5M power cable which allows for easy placement in a variety of areas.
It's ideal for places where pesticides can't be sprayed such as kitchens, restaurants and hospitals. Made from sturdy, durable aluminium, this low maintenance fly zapper is scratch proof, corrosion proof and has an ABS fire-proof plastic sideboard.
The bulbs have an impressive maximum output of 43W and a large area coverage of up to 100m². Use your XZAP40 Electric Fly Killer wall mounted, free standing or ceiling suspended - it's completely up to you!
The powerful electric grid is surrounded by a protective cage making it safe for home use.
Supplied with a free cleaning brush for easy maintenance and to remove any dead flies from the grid (ensure the unit is switched off before cleaning)
Reviews
Customer Questions
Remove the catchment tray & carefully lay the unit face down on a flat surface so the power cable shows from the rear. Then remove the two screws and mesh securing washers from the top rear of the mesh. REmove the two bottom screws from the black plastic side furthest away from the power cable. Important:only remove the bottom two screws, the top two screws on the black plastic side stay in position. Carefully remove the rear mesh which will expose the two bulbs. Carefully twist the bulbs one at a time so the prongs on each bulb face downwards and remove. Carefully insert new bulbs and twist into position. Place the rear mesh back into position ensuring the top section is pushed under the top section of the unit. Insert two screwsand mesh securing washers into place. Insert two screws into position on the bottom section of the black plastic side. Insert the catchment tray and the unit is ready to use.
Ask one of our experts!
We aim to answer all questions as soon as possible - often within a few hours! Although please bear in mind that during busier periods it may take up to 48 hours to receive a response. We look forward to hearing from you.
| Email: | |
| Phone: | |
| Question: | |
| Business name: | |


