Telescopes
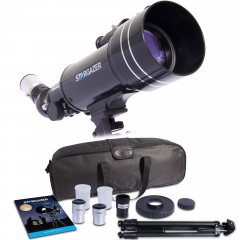
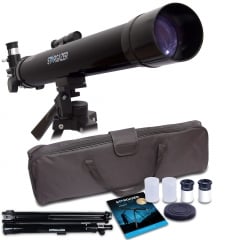
You don't need to be an astronaut to explore the cosmos. Bring the stars to you with these telescopes! Below you'll find models that are perfect for beginners as well as more experienced stargazers. View our moon in stunning detail or bring distant planets, galaxies, and nebulae into clear view. You'll never look at the night sky the same way again.
Everything You Need to Know About Telescopes
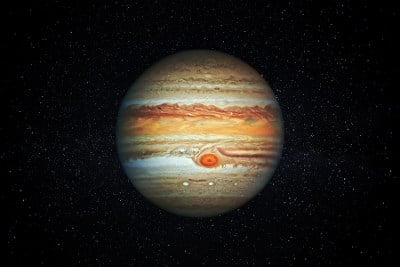 There are few things more exciting than exploring the cosmos – the last great unknown. While few humans will ever get to go into space, anyone can explore the stars from the comfort of their own backyard using a telescope! Whether you want to spark curiosity in kids or you simply want to see the wonders of the solar system for yourself, a telescope makes a wonderful addition to any home.
Telescope Buyer’s Guide
If you know what you’re looking for, browse the models above and pick the one you like the most. However, if you’re new to the world of stargazing, all the jargon and numbers might seem a bit overwhelming. There’s a lot to consider when buying a telescope, and some of it can seem quite complex. If you’re not sure where to start – keep reading. Our buyer’s guide will break it all down in simple terms, so you can make the right choice and get the most from your purchase.
Refraction
There are many different varieties of telescopes that work in very different ways, but the most popular type is the refraction telescope. These work using a set of lenses. The lenses focus light inwards, bending the light and making whatever you’re looking at appear closer. High-quality lenses can bend the light more, offering a closer-looking, clearer image. You should also look out for models that use coated lenses – ideally, multi-coated lenses. This is because, when light travels through the lens, some of it will simply bounce off. This lost light reduces the overall quality of an image – think of it as trying to look through a dirty window. A coated lens will lose less light this way, creating a sharper and more accurate image.
Refraction telescopes have many advantages, especially if you’re a beginner. They’re affordable and offer great value for money, for one thing. They’re also really simple to set up and use, which means you can take them out with you. This is important if you live in a built-up area with lots of street lights as it means you can pack your telescope up and take it to a darker, rural area to get the best views.
A Matter of Degrees
Telescopes create a circular image of the night sky. We measure the size of the objects that appear in that image – for example, the moon – in degrees. As a point of reference, the moon takes up around 1/2° in the night sky. This is important to remember, as you’ll often see references to degrees when shopping around for telescopes.
Magnification
 Magnification is one of the most commonly misunderstood features of a telescope. It does, as you might expect, make objects appear bigger in the sky. A 50x magnification telescope will make the 1/2° disc of the moon appear 25° in size. However, raw magnification power alone doesn’t result in a clear image. Without quality lenses, or the right aperture or focal length (we’ll explain these shortly), excessive magnification results in distant objects looking muddy and grainy. Magnification is great if you know how to use it. It can examine closer objects, such as the moon or a cloud formation, in finer detail and, if you have a telescope with a long focal length, it can bring distant galaxies and star clusters into pin-sharp clarity.
Telescope Eyepieces – Which Size is Right?
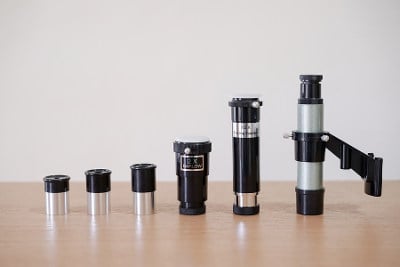
You can adjust the magnification of your telescope by changing the eyepiece. The models you’ll find above come with different eyepieces of various sizes. For example, the Stargazer Pro Telescope includes 10mm and 25mm eyepieces (as well as a Barlow lens, which we’ll get to shortly). The size of an eyepiece refers to focal length, with longer focal lengths providing a wider, but lower-magnification view of the sky. This is ideal for viewing distant objects, or for centring objects in your field of view before switching to a higher-magnification eyepiece for a closer look. Shorter focal lengths provide a more magnified image with a narrower field of view. Generally, you should start with the largest eyepiece you have to find an object in the sky, and gradually decrease the size to home in on your target.
Barlow lenses aren’t technically eyepieces, but they can be used alongside your eyepiece to great effect. They fit between your eyepiece and the lens of the telescope, magnifying the image by a factor of 3X. Barlow lenses essentially give you extra magnification power, so you have even more flexibility to get your view of the night sky looking just right.
Aperture
Aperture is arguably the most important thing you can look out for when buying a telescope. It measures the diameter of the light-gathering lens at the end of your telescope. Put simply, the more light that enters your telescope, the more you’ll be able to see. When it comes to aperture, bigger is almost always better. An aperture of 70mm or above will let you see distant galaxies, planets, and star clusters in much greater detail than a smaller aperture would. Aperture is far more useful than high magnification when it comes to viewing these distant wonders. Smaller apertures have some benefits – they’re much more affordable, for one thing – but you may need to set your telescope up away from street lights to view distant celestial objects.
Don’t Overlook the Mount
It’s easy to overlook when getting lost in the intricacies of lenses, aperture, and eyepieces, but a good mount is simply essential when shopping around for a telescope. You can have an incredibly advanced telescope that ticks every box, but if it’s mounted on an unsteady, wobbly tripod, you’ll be left with a blurry and shaky image of the stars. A solid stand is essential if you want to be able to focus on your targets in the sky. The models above include durable aluminium stands that will give you a solid foundation on any surface.
A good mount will also let you move your telescope into the right position easily. The best mounts let you swing your telescope from side to side as well as up and down, and include a strong locking nut to keep them firmly in place.
Finder Scope
A finder scope does what it says on the tin – it gives you a wide, low-magnification look at the sky to make finding your target easy. Once you’ve found it, you can switch to your main scope to make the small adjustments needed to get the perfect view. Finder scopes are really useful if you’re just starting out and aren’t sure how to position your telescope yet.
Setting Up Your Telescope – Don’t Fear the Dark
If you want to really explore the furthest reaches of the cosmos, you’ll need to set up in a dark area. If you live in a rural area with no street lights, that might only be your backyard. However, if you live in a built-up area, you may need to head out into the countryside. If you have the right telescope – such as the Stargazer Pro above – this will help you explore the deepest reaches of space! Bring distant planets, nebulae, vast clouds of interstellar gas and clusters of stars into clear view, or just view the billions of years of history etched into our moon’s surface in stunning clarity. When conditions are just right, it’s remarkable what you can see!
The Perfect Conditions for Stargazing
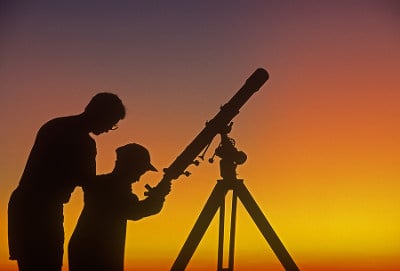 Unfortunately, setting up your telescope perfectly is only half the battle. You’re still at the mercy of the Earth’s weather and atmospheric conditions, no matter where you go. It goes without saying that you won’t see much on a cloudy night, but there’s still another issue you’ll come across even on clear nights: atmospheric seeing. Seeing is the term we use to describe atmospheric turbulence – disturbances in the air that can make your view through the telescope appear blurry and wobbly.
Poor seeing doesn’t necessarily mean a stargazing session is over, but it can make it difficult to see distant, fainter objects in the sky. While you can’t control all of the atmospheric conditions, you might be surprised to know there’s a lot you can do to give yourself the best seeing.
Watch the weather reports for any news of warm or cold fronts arriving. These occur when warm or cold air blows in and displaces the air that’s already around you. This displacement causes a lot of turbulence in the atmosphere. Depending on whereabouts in the sky you’re looking, this can make it very difficult to see clearly. If the air above you is settled, you’ll be able to see much farther. Listen out for weather reports talking about high-pressure systems, which bring a few straight days of clear skies. Try to go out on these settled, clear nights to give yourself the best chance!
A surprising amount of air disturbance comes from close to the ground, including your telescope itself. The first thing you can do is leave your telescope to cool down to your surroundings’ ambient temperature. Warmer air will rise up in front of your lens until your telescope cools down, so set it up and leave it for a few minutes.
Your surroundings also influence the quality of seeing you’ll get. Tarmacked areas will store up a lot of heat throughout the day, which gets released at night. This heat can displace the cooler night air, which again causes poor seeing. Setting up near grass and shrubbery can help you see more clearly. The best airflow is actually found near the coast, where the wind cools as it blows in from the ocean. However, if the coast is a step too far for you, try and set up on rolling hills or a large, flat field.
To summarise; the best viewing can be found on a clear night that follows a string of clear days. Set up in a dark, rural area on grass surrounded by lots of shrubbery with as little tarmac as possible.
What Can You See with Your Telescope?
So, you’ve set up your telescope, it’s a clear, crisp night, and you’re ready to explore the heavens. But what can you actually see up there? Using the Stargazer models you’ll find above, here are a few cosmic sights you can see.
The Moon
As it’s our closest neighbour, the moon is something you’ll have seen before. But, when viewed through a telescope, you’ll be able to see it in a whole new light. Each crater tells a story, stretching back billions of years to when the moon was first formed in a collision between Earth and a smaller planet. As only a handful of people have ever set foot on its surface, large parts of the moon are completely undisturbed – the craters and mountains you see on its surface have looked that way for billions of years! Take in lunar landmarks such as the famous Sea of Tranquility, the majestic Lunar Alps mountain range, or the vast Tycho crater from the comfort of your own back garden.
Saturn
If the conditions are right, you’ll be able to see the famous ringed planet Saturn, around 850 million miles away! Check the internet for an approximate position of Saturn in the sky on a clear night and have a look – you’ll be able to pick out this gas giant and its distinctive rings if you’re lucky! If conditions aren’t right for seeing Saturn, you may be able to spot two of our closer neighbours in Jupiter and Mars.
Orion’s Nebula
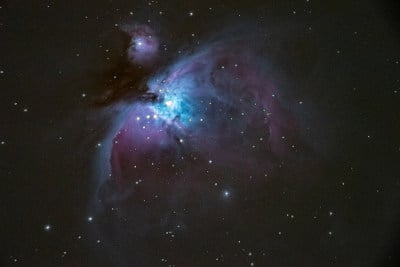 One of the most wondrous sights you can expect to see on a clear night is Orion’s Nebula. A nebula is a vast cloud of gas and dust that gives birth to new stars. Orion’s Nebula measures around 40 light years in size, and you may be able to witness some of the cosmic colours in this stellar nursery if conditions are right.
Proxima Centauri
At around 4 light years away, Proxima Centauri is the closest known star to our own sun. It’s a relatively small star that is notable because it keeps Proxima Centauri b – our closest known exoplanet – in its orbit. This exoplanet (meaning a planet located outside our solar system) may contain liquid water and some astronomers theorise it could be habitable – meaning it could harbour life.


